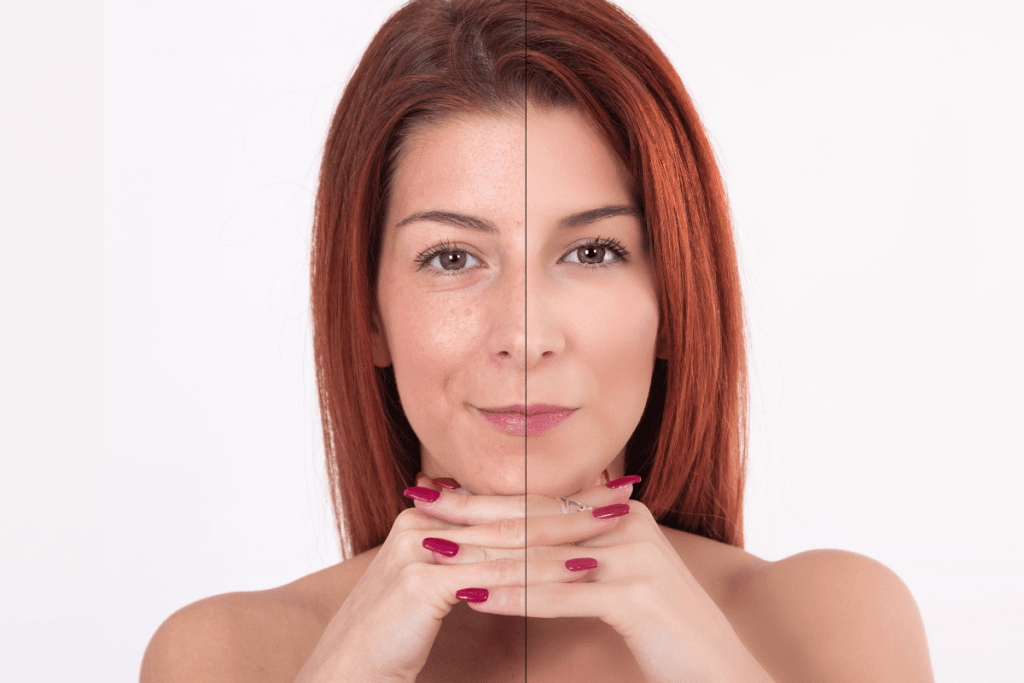
Juvederm before and after photos should work as clinical documentation, not just visual marketing. For clinics, the goal is to capture comparable baseline and follow-up images that show treatment context, patient goals, product use, timing, and any early post-treatment changes. Clear photo standards help teams explain outcomes, audit records, and reduce confusion when multiple staff members participate in care.
Key Takeaways
- Standardize capture: Use repeatable views, lighting, distance, and expression.
- Link images to records: Document product, lot, treatment area, intent, and visit date.
- Separate timing stages: Distinguish immediate swelling from more settled comparison images.
- Plan for exceptions: Define how staff document dissatisfaction, asymmetry, or suspected complications.
- Use photos carefully: Follow consent, privacy, storage, and advertising rules.
Why Clinic Photo Protocols Matter
A before-and-after image is only useful when the two images are comparable. Small changes in camera distance, head tilt, makeup, lighting, or facial expression can make results look better, worse, or different than they are. That matters when a patient asks about lips, cheeks, under-eyes, jawline definition, or marionette lines.
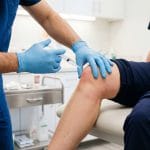
For healthcare professionals, the strongest protocol treats photography as part of the clinical workflow. The image set should support baseline assessment, treatment planning, follow-up review, and quality assurance. It should not replace the chart note or the clinician’s assessment.
MedWholesaleSupplies serves licensed clinics and healthcare professionals, so this page focuses on documentation standards and operational fit. For broader category context, the Dermal Fillers collection can help teams align terminology across injectable products.
Why it matters: Inconsistent images can create perceived outcome changes that are caused by photography, not treatment.
Building A Repeatable Juvederm Before And After Workflow
A repeatable workflow starts before the camera is used. Staff should know which facial areas are being assessed, what the patient’s stated concern is, and which views are needed for that concern. A lip case may need close-up frontal and oblique views. A cheek or jawline case often needs wider frontal, oblique, and profile views.
Use the same setup at baseline and follow-up whenever possible. Keep the same background, camera device, lens setting, chair height, light position, and patient distance. Avoid beauty filters, auto-enhancement, dramatic shadows, or mixed natural and artificial light. Even helpful-looking edits can weaken clinical comparability.
Neutral expression matters. Smiling can change vermilion show, oral commissure position, cheek projection, and nasolabial folds. Chin lift can sharpen or soften the jawline. Hair placement may obscure temples, cheeks, or mandibular borders. These details should be part of staff training, not left to preference.
Minimum Image Set By Treatment Area
Clinics can adjust the image series to their services, but the minimum set should be explicit. A consistent baseline helps staff compare outcomes across providers and visit dates.
- Lips: Frontal, oblique, profile, and relaxed close-up views.
- Cheeks: Frontal, both obliques, both profiles, and midface close-ups when needed.
- Under-eyes: Frontal and oblique views with controlled lighting to reduce shadow bias.
- Jawline and chin: Frontal, oblique, profile, and neck-position-controlled views.
- Marionette lines: Frontal and oblique views with relaxed mouth position.
What Staff Should Avoid
Most poor comparisons come from preventable variables. Avoid different makeup coverage, strong facial expressions, inconsistent camera zoom, different room lighting, or a different angle of capture. Ask patients to remove glasses when clinically appropriate and pull hair away from relevant anatomy.
When teams compare product families or treatment approaches, the Juvederm For Clinics resource can support internal discussion about formulation language, safety workflow, and documentation habits.
Chart Details That Give Photos Clinical Value
Juvederm before and after images need chart context to become meaningful records. A photo may show contour, projection, or symmetry, but it does not show treatment intent, product identifiers, consent details, or the patient’s reported concern. Those details belong in the clinical record.
At minimum, document the treatment area, patient goal, baseline findings, product name, lot number, expiration date per clinic policy, treatment date, injector, and follow-up date. Record relevant asymmetry before treatment. Otherwise, a pre-existing difference may be mistaken for an outcome issue.
For clinics that use specific product templates, product pages can help staff confirm naming consistency. Examples include Juvederm Voluma With Lidocaine for midface-oriented documentation language and Juvederm Volbella With Lidocaine for records that reference lip or perioral refinement. Use product-specific references only where they match your clinic’s actual treatment and inventory records.
Documentation Elements To Pair With Each Image Set
| Element | What To Record | Why It Helps |
|---|---|---|
| Baseline concern | Patient-stated goal and clinician-observed anatomy | Connects the images to the treatment plan |
| Views | Frontal, oblique, profile, and close-up images as relevant | Reduces bias from one flattering or unflattering angle |
| Product record | Name, lot, expiration date, and visit date per policy | Supports traceability and chart review |
| Technique context | Treatment area, side, and planned endpoint | Clarifies what the images are intended to show |
| Follow-up notes | Patient report, clinician findings, and timing from treatment | Separates subjective satisfaction from observed change |
MedWholesaleSupplies provides brand-name medical products through vetted distributor and supply channels for licensed clinics. In documentation workflows, that context is relevant because product traceability and chart accuracy should align from receiving through treatment records.
Timing, Swelling, And Outcome Interpretation
Early images are not the same as settled comparison images. Immediately after treatment, photos may show edema (swelling), ecchymosis (bruising), redness, or temporary contour irregularity. These short-term findings can be more visible in high-resolution photography than during a brief in-room conversation.
Clinics should define which images count as immediate post-treatment documentation and which images count as follow-up comparison. This distinction helps staff answer common questions about why lips, cheeks, or lower-face areas may look different across visits. It also helps prevent overinterpretation of a single image taken at a variable time point.
Duration questions come up often. Patients may ask how long injections last or what one syringe can change. A clinic-safe response should stay general unless the treating clinician is giving patient-specific counseling. Outcomes may vary by product, treated area, tissue characteristics, technique, volume used, and individual response. Refer to product labeling and clinic policy when discussing expected ranges.
For cheek-focused records, the Cheeks Clinical Photo Review page offers a more area-specific way to think about midface views, lighting, and interpretation.
Quick tip: Label image series by timing, not just by “before” and “after.”
Area-Specific Photo Considerations
Different facial areas need different documentation emphasis. The same photo setup can provide a consistent foundation, but staff should know which features matter most in each treatment zone.
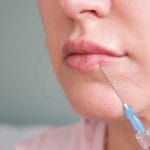
Lips And Perioral Areas
Lip images should capture border definition, upper-to-lower lip balance, oral commissures, and resting symmetry. A relaxed mouth position is important. Pursing, smiling, or talking can change the apparent result. For perioral concerns, include the surrounding skin and lower face, not just a cropped lip close-up.
Cheeks And Midface
Cheek documentation should show midface contour, projection, and shadow patterns. Oblique views are often useful because frontal images may understate contour change. Lighting must be tightly controlled, especially when shadows under the eyes could be mistaken for volume deficit.
Clinics reviewing cheek-related treatment planning can also use Juvederm Voluma Cheeks as related reading for product-context alignment and staff education.
Jawline, Chin, And Lower Face
Lower-face photography is highly sensitive to posture. A small chin lift can make the mandibular border appear sharper. Neck flexion can make the jawline look softer. Use a consistent head position, relaxed lips, and the same camera height for each session.
For feature-based cases, include enough of the neck and lower face to assess balance. A tight crop may hide the chin-lip relationship or mandibular contour.
Handling Dissatisfaction, Adverse Events, And Edge Cases
Every clinic should have a pathway for documenting concerns after filler treatment. Photos alone do not diagnose a complication, but they can support a clear timeline. Record what the patient reported, what staff observed, when symptoms began, and what escalation steps were taken under the clinic’s medical protocols.
Common non-emergency concerns may include asymmetry, swelling, bruising, or contour visibility. More serious symptoms require prompt clinical assessment. Staff should follow the clinic’s escalation policy and applicable reporting requirements for suspected adverse events. Avoid minimizing patient concerns in the chart, and avoid using images as the only record of the issue.
Consent also matters. If images may be used for teaching, quality assurance, or external marketing, the permission should be specific and documented. Internal clinical photographs still require privacy safeguards, controlled access, and compliant storage. Cropping should not change the clinical meaning of an image.
Comparing Images Across Products And Treatment Goals
Juvederm before and after comparisons should be interpreted alongside product choice, treatment area, and technique notes. Hyaluronic acid fillers differ in properties such as firmness, spread, and tissue support. Those differences can affect what is visible in photographs, especially in thin skin or mobile areas.
For staff education, the Visible Results And Lasting Impact resource can help frame patient-facing expectations in a way that remains tied to clinical review. The Juvederm Treatments Popularity page can also support broader team discussions about why patients ask about this filler family.
Cost and volume questions should be handled carefully. A phrase like “one syringe” does not predict a uniform outcome across patients or facial areas. A clinic estimate may depend on product selection, assessment findings, visit structure, and the amount used under the treatment plan. Keep documentation factual and avoid using photos to imply guaranteed results.
For browsing broader injectable categories, the Dermal Fillers Product Category can help procurement teams check product grouping and naming conventions without turning clinical notes into sales language.
Clinic Operations Checklist
A practical photo protocol works best when it is easy to repeat. Assign ownership, train staff, and audit image sets alongside chart quality. The checklist below can be adapted to local policy and regulatory requirements.
- Confirm consent: Verify clinical photo permissions and any separate use permissions.
- Prepare the room: Use fixed lighting, background, chair height, and distance markers.
- Prepare the patient: Remove visual obstructions and request a neutral expression.
- Capture standard views: Use the required image set for the treatment area.
- Record product details: Link product identifiers to the visit note per policy.
- Label image timing: Distinguish baseline, immediate post-treatment, and follow-up series.
- Store securely: Save images in the approved clinical record system.
- Audit consistency: Review photo quality during chart or workflow checks.
For broader workflow topics beyond photography, the Clinic Operations collection may help practice managers align documentation, procurement, and internal process training.
Authoritative Sources
Use primary and specialty sources when writing consent language, staff protocols, or internal education materials. Regulatory and professional references help keep documentation neutral and medically grounded.
- FDA dermal filler information for patients and providers
- American Society for Dermatologic Surgery filler overview
- American Society of Plastic Surgeons filler safety information
In summary, Juvederm before and after documentation is strongest when images are standardized, linked to the chart, interpreted by timing, and stored under clear privacy controls. Treat each image set as clinical data that supports care continuity, not as a standalone proof of outcome.
________________________________________________________________________________________
Medically Reviewed by: Ma Lalaine Cheng.,MD.,MPH
This content is for informational purposes only and is not a substitute for professional medical advice.