Key Takeaways
- Standardize images: Control pose, lighting, lens, and distance.
- Document context: Record product, lot, sites, and treatment intent.
- Set expectations: Explain early swelling versus settled appearance.
- Plan for exceptions: Define how you capture and triage adverse outcomes.
Overview
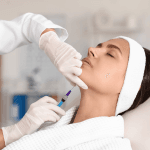
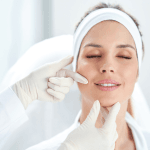
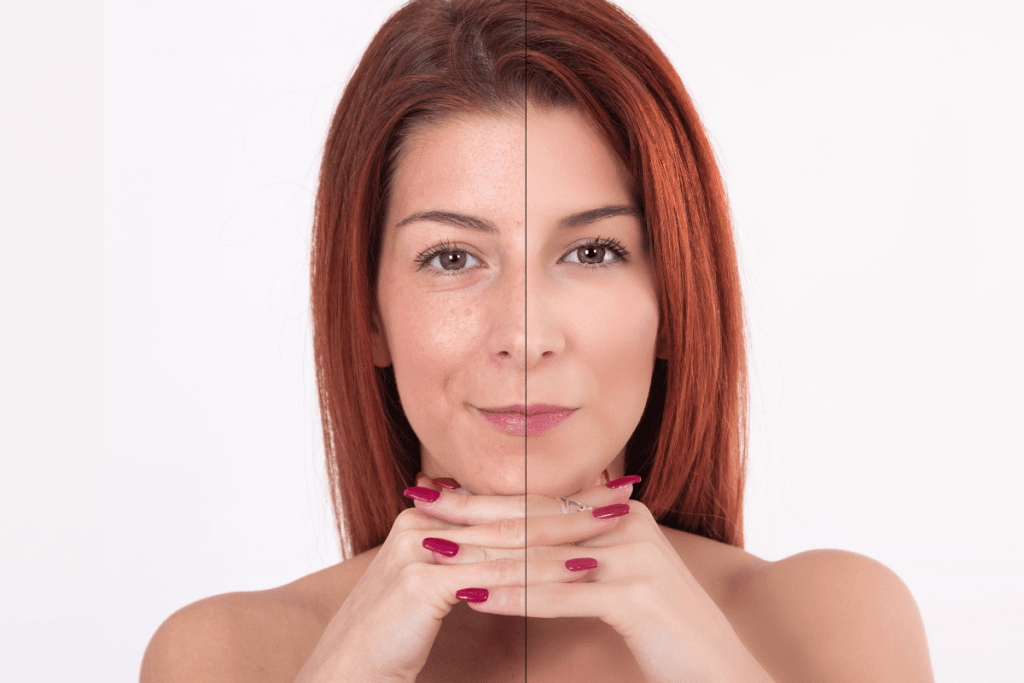
In aesthetic practice, juvederm before and after photos can function as both clinical documentation and a communication tool. They support baseline assessment, guide follow-up discussions, and help teams align on what “improvement” means for each facial unit. When photos are inconsistent, outcomes look inconsistent, even when technique is sound.
Why this matters for workflow: a photography protocol reduces rework. It also improves chart quality when multiple injectors contribute to care. MedWholesaleSupplies serves healthcare professionals, so the emphasis here is on clinic-grade documentation rather than consumer-facing galleries.
This page focuses on repeatable imaging steps, chart elements that strengthen your record, and common interpretation pitfalls. For broader terminology and product class context, see Dermal Fillers as a reference hub for related injectables and reading. For injection safety foundations, cross-check your internal SOPs against Safety First Protocols to keep documentation aligned with risk controls.
Juvederm Before And After Photos: A Clinic Standardization Framework
Standardization is the difference between an “okay” image and a usable record. Your goal is comparability, not artistry. Clinics often benefit from a fixed set of views (frontal, oblique, profile) and a fixed capture setup (background, chair height, and light position). When those inputs stay stable, the output becomes clinically interpretable.
Many teams also define what is not acceptable for outcome comparison. Common exclusions include different makeup coverage, different hair placement, strong expression changes, and variable zoom. MedWholesaleSupplies lists authentic, brand-name medical products, which supports clinics that require traceable inventory and consistent documentation standards.
Tip: Treat each follow-up series like a “re-shoot” of baseline. Same lens, same distance, same head position, same expression.
Core Concepts
1) Baseline Assessment: Map Anatomy to the Patient’s Goal
Before you ever pick up a camera, align the image set to the presenting concern. Patients may describe “tired eyes,” “flat cheeks,” or “downturned corners.” Your chart may describe infraorbital hollowing (under-eye hollow), midface volume loss (cheek flattening), or marionette lines (mouth-corner lines). A shared vocabulary reduces confusion when staff review images later.
Include what you see and what you plan to evaluate. Examples include symmetry notes, skin quality, and dynamic movement. For teams comparing filler categories across indications, Types Of Dermal Fillers can help standardize internal language for charting and staff training.
2) Control the Variables: Lighting, Distance, and Expression
Photo variability most often comes from small changes that feel harmless in the room. Overhead lighting can exaggerate shadows under the eyes. Side lighting can sharpen nasolabial folds (smile lines) and marionette lines. Camera distance changes perceived proportions, especially for lips and the nose. Even mild smiling can change vermilion show and oral commissure position.
Write your photo protocol like a sterile setup: it should be repeatable by any trained staff member. Include fixed marks (floor tape), a fixed chair position, and an exposure rule (no “auto-enhance”). Some clinics also keep a quick checklist in the camera room. Supplier quality controls matter here too, because inventory should come from screened distribution channels when clinics rely on lot-level traceability.
3) Understand Product and Area Differences (Without Overpromising)
Juvederm is a family of hyaluronic acid (water-binding gel) dermal fillers, and outcomes vary by product selection and facial area. That variation affects what you should photograph. Lips often show swelling and contour changes quickly, while midface correction may be more subtle in a single view. Under-eye work is especially sensitive to lighting and angle, because shadows can look like volume deficits.
When your chart references a specific product, link it to a stable baseline image set. If your clinic uses product-specific documentation templates, referencing examples like Juvederm Voluma for midface support or Juvederm Volbella for lip refinement can keep internal teams consistent in how they label indications and expected visual endpoints.
4) Timing and Interpretation: “Early” Versus “Settled” Images
Staff will often be asked to explain why a patient’s early pictures look different from later ones. Early images can reflect edema (swelling), ecchymosis (bruising), and transient contour irregularities. Those temporary effects may be more obvious in high-resolution images than in person. This is one reason many clinics maintain internal definitions for what counts as a baseline set versus a meaningful comparison set.
Search behavior also reflects this need for clarity. Teams see requests like “1 ml lip filler before and after healed” or “how long does Juvederm last.” Your safest approach is to document what you see, avoid guaranteeing timelines, and refer patients to product labeling and your standard follow-up process. For practice-wide education on duration discussions, How Long Lip Fillers Last can support staff scripting and chart note structure.
5) Manage the Edge Cases: When Results Don’t Match Expectations
Every clinic needs a plan for dissatisfied outcomes and complications, because those cases drive chart scrutiny. Online searches often include phrases like “marionette lines filler gone wrong.” Clinically, that can represent anything from under-correction to visible product, asymmetry, delayed swelling, or rare vascular occlusion (blocked blood vessel). Photos alone do not diagnose these issues, but they can support a clear timeline and escalation record.
Document what was reported, what was observed, and what actions were taken under your medical director’s protocols. If your clinic maintains a correction pathway, ensure staff know where it lives and how to chart it. For a neutral overview of reversal concepts and decision points, Dermal Filler Removal is a useful internal reading link for onboarding and policy review.
6) Consider Male Aesthetics and Feature-Based Goals
Requests like “juvederm before and after men,” “male jawline filler before and after,” or “men chin filler before and after” often reflect a different success metric than in female patients. Patients may prioritize angularity, chin projection, or lower-face definition, and they may be less focused on “softening.” That changes what you photograph and how you frame the comparison.
Use consistent neck position and neutral expression to avoid artificial jawline changes. Capture views that show mandibular border continuity and chin-lip relationship. MedWholesaleSupplies supplies products intended for licensed clinical use, which supports practices that require structured protocols for documenting feature-based outcomes. For a deeper clinic-facing discussion of approach and language, Dermal Fillers For Men can reinforce staff alignment.
Practical Guidance
Clinics that get repeatable imaging results usually treat photography as a clinical station, not an optional add-on. Assign ownership, train for consistency, and audit images the same way you audit charts. This reduces disputes about what changed and supports clearer internal QA.
In day-to-day operations, juvederm before and after photos work best when they are tightly linked to documentation. The image set should point back to the chart note, and the chart note should explain what the images are meant to show. Many compliance teams also prefer brand-authentic supply channels to support reliable lot documentation and product traceability.
- Define a minimum image set for each indication (lips, cheeks, under eyes, jawline).
- Lock the capture environment (background, light position, distance markers).
- Standardize patient preparation (remove glasses, pull hair back, neutral expression).
- Record the clinical context (indication, side, asymmetry notes, planned endpoint).
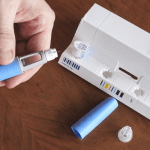
- Document product identifiers (product name, lot number, expiration date per policy).
- Use the same follow-up workflow so comparisons remain meaningful.
| Documentation Element | What to Capture | Why It Helps |
|---|---|---|
| Views | Frontal, both obliques, both profiles; close-ups as needed | Reduces angle bias in comparisons |
| Lighting | Fixed light source and intensity; no beauty filters | Prevents shadow-driven “false changes” |
| Position | Head level, consistent chin tilt, consistent camera distance | Keeps proportions and contours comparable |
| Chart linkage | Indication, facial unit, product, and treatment date in note | Supports QA review and continuity of care |
| Outcome notes | Patient-reported satisfaction and clinician-observed changes | Separates subjective goals from objective findings |
Note: Photography must follow your privacy and consent policies. Keep storage access limited and audit-able.
Cost questions are common, including “juvederm cost” and “marionette lines filler cost.” Avoid quoting from memory. Instead, document what drives the estimate in your clinic (product choice, volume used, complexity, and visit structure). Clear documentation reduces misalignment when patients compare cheeks versus lips, or ask “how much does Juvederm cost for lips” versus “how much does Juvederm cost for under eyes.”
Compare & Related Topics
Teams often need to explain how “before and after” differs across filler types and treatment strategies. Within hyaluronic acid fillers, different rheology (how a gel flows and supports tissue) can influence contour and visibility on camera, especially in thinner skin. This is one reason comparison photos should be interpreted alongside product selection and technique notes, not as standalone proof of a product’s performance.
When clinics compare portfolios, juvederm before and after photos can also be contrasted with outcomes from other HA lines or biostimulatory products. For a clinic-facing comparison framework, see Revanesse Vs Juvederm for terminology and selection considerations, and Sculptra Vs Juvederm for discussion points when patients ask about collagen-stimulating approaches versus HA gels. Distributor verification processes also matter when clinics evaluate product lines, because supplier onboarding typically includes checks on distribution legitimacy.
For specific areas, keep your comparisons indication-based. “Juvederm before and after lips” may emphasize border definition and symmetry. “Juvederm before and after cheeks” often focuses on midface projection and tear trough shadow changes. For lower-face concerns and combined treatment planning (including neuromodulators where appropriate), Marionette Lines Fillers can support your staff when patients bring “marionette lines treatment” or “marionette lines botox before and after” questions to the consult.
Clinic Ordering and Compliance Notes
Ordering on professional supply platforms is typically restricted to licensed clinics and credentialed healthcare professionals, and your account should match your facility and prescriber documentation. Maintain internal controls for receiving, inventory counts, and lot tracking so your photos and chart notes can be matched to specific product identifiers when needed.
If your clinic uses juvederm before and after photos in a formal documentation workflow, build compliance into the same process. Store images in the designated clinical record, apply consistent naming conventions, and limit edits to cropping that does not change content. For brand portfolio reference and internal catalog alignment, the Juvederm Brand page can help staff confirm naming consistency across chart notes. MedWholesaleSupplies sources products through vetted distributors, which supports clinics that require documented sourcing pathways.
Storage, handling, and use should follow the current product label and your jurisdiction’s requirements. If an adverse outcome is suspected, document the timeline, assessment, and escalation steps under your medical director’s protocol, and follow your reporting obligations.
Authoritative Sources
Use primary sources when you write internal policies or patient-facing consent language. Regulatory and specialty-society references help keep your documentation neutral and defensible. MedWholesaleSupplies focuses on supplying licensed clinical customers, which aligns with teams that need professional-grade documentation habits.
- FDA: Dermal Fillers (Soft Tissue Fillers)
- American Society for Dermatologic Surgery: Dermal Fillers Overview
- American Academy of Dermatology: Soft Tissue Fillers
Recap for clinic teams: treat images as clinical data. Standardize capture, document context, and define how you interpret early changes. When done well, juvederm before and after photos reduce ambiguity across lips, cheeks, under eyes, and jawline, and they strengthen continuity when multiple staff members participate in care.
This content is for informational purposes only and is not a substitute for professional medical advice.
________________________________________________________________________________________
Medically Reviewed by: Ma Lalaine Cheng.,MD.,MPH